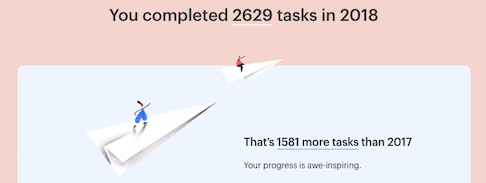
One of the most important tools I use every day is Todoist. I’ve used several task list products, but none have stuck as well as Todoist. My favorite feature is the ability to create custom filters to display your tasks, which are the views I use most often. But in order for those filters to be effective, I rely on a larger system.
I view task management systems as having two primary characteristics: process and structure. While the two are complementary, the process deals with the “how”, the structure is the result of applying the process to organize your tasks.
I’ve been using Todoist since 2014, but it wasn’t until I read David Allen’s Getting Things Done in 2018 that I really started making the most of it:

I follow a few simple rules for process, all of which are from David Allen’s book. I would recommend reading it, if you haven’t.
Whenever a new thing to-be-done pops into my head, I add a new task into the Inbox, with just enough description that will let me remember what I was thinking about. The task can be clarified later, when sorting the Inbox. If I have the time when recording, I’ll take another minute to capture anything else that comes to mind. At least once a day, I go through and organize the inbox. But if I see that it is growing or if I brainstorm a lot of tasks at once, I organize more than once a day.
For many years with Todoist, I would somewhat arbitrarily assign dates to tasks: they were either aspirational or just rough estimates of when the item would get done. Now, I only assign dates if:
When organizing items out of the Inbox, it’s important to make sure that the task represents a single, concrete action. If the task implicitly contains more than one action, it should be broken down into a project containing those steps. I find that if I’m having a hard time making progress on a task, that is usually because it hasn’t been split into its next actionable piece.
Rather than setting dates for most tasks, I use two systems to decide what gets done next: priorities and labels. Todoist has four priorities, which I map to:
Most days, I expect to knock out all of the P1s and P2s that I have set, and some number of the P3s.
I also use labels to help organize tasks, and I’ll give some specific ideas about context, time, and effort below. But there are two cross-cutting labels that are integral to the process:
The @next label is what I look at most often. When reviewing tasks (see rule 5) or when organizing from the Inbox, things that need to get done get the @next label applied.
I apply the @waiting label when I cannot complete an action because of some external dependency (e.g., waiting on a reply to a message). When I put the @waiting label on a task, I also mark the date I started waiting for it, and if necessary to help me remember, what specifically I am waiting for. If I need the dependency resolved by a specific date, I will also put in a due date to remind me to go chase it.
Every week I set aside an hour to review Todoist using the GTD checklist. At the end of my weekly review, the goal is to have:
The process above is general. It helps capture tasks into the Inbox, which can be later sorted and prioritized into single, next actions. The structure described below is how I organize the tasks after applying that process. While there are some elements to this structure that are common to the GTD system as a whole (e.g. Someday/Maybe, Tickler, @next, and @waiting), the structure will largely be dependent on what you actually have to do.
I make extensive use of projects in Todoist. I maintain two big umbrella projects: Personal and Work, under which I nest longer-running (but ultimately completable) projects.

Projects in Todoist are a bit heavyweight, so I only create a project for something that will take me a month or more to complete. For smaller projects, I do not create a full Todoist project, but instead use nested tasks, with the top task labeled @project. This means that my top-level Personal and Work projects contain single, one-off tasks or small projects with nested tasks. Anything larger gets a full Todoist project.
I also have a few other top-level projects that I use regularly:
Two special projects that are influenced by the GTD methodology are the “Someday/Maybe” and “Tickler” lists. Both my Personal and Work umbrella projects have each of these.
Someday/Maybe contains ideas for things to do in the future. When I decide to actually start work on one, these most likely become projects. The items in this list should be reviewed regularly (GTD says weekly, but I do it more monthly). Sometimes I delete items here if I decide they will not ever get done.
The Tickler file (see rule 2) contains all the tasks that need to bubble back up on a specific date. When the date arrives, the task is prioritized, labeled (likely with @next), and moved to the right project.
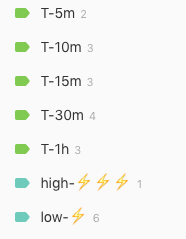
Besides the @waiting and @next labels, I also sometimes add labels for time and effort:

These let me find quick or easy items when I’m tired or have a small amount of time to get things done. The time-based labels are used heavily in my WATCH project, for videos and tech talks.
I also use labels to divide tasks by context, so that if I am out I can look at the @errand label:

The use of @work and @home may seem duplicative of the Personal and Work projects, but there is a subtle distinction. I can have personal tasks that need to be done for or at work, like articles on my READ list that are work-related. And I can have Personal tasks that can only be done when physically at-home.
The most powerful feature of Todoist is filters, which allow you to customize the display of tasks precisely to your liking. These are the two filters I spend most of my time looking at:
Next Personal:
(overdue | today) & !@waiting & !##Work,
p1 & !@waiting & no due date & !##Work,
@next & !@waiting & !##Work & !@work,
tomorrow & !##Work & !@work
Next Work:
(overdue | today) & ##Work,
p1 & !@waiting & no due date & ##Work,
@next & !@waiting & ##Work,
@work & !@waiting & (today | overdue | no due date)
When you use a comma in a filter, Todoist divides the result list into sections. These filters are roughly equivalent and show me:
I use ##Work to filter on all Work and its related sub-projects, since all other projects are
inherently Personal. The exception are tasks that are labeled @work, as noted above.
There are a few differences between the filters, besides just the showing/hiding of work:
To get a combined view, I also have a mega Next Actions filter:
overdue,
today,
p1 & no due date & !@waiting,
@next & !@waiting,
tomorrow
I have those three filters as my Todoist favorites, so they are easily accessible.
Todoist can be used with a variety of different task management frameworks, but I think it is exceptionally well-suited to GTD. The product’s flexibility means you can customize and organize in whatever way suits you best. The structure I showed above is radically different than what I was using before I read the GTD book, which underscores that. I do wish that Todoist handled sub-tasks better, but that is a relatively minor quibble in an otherwise great product.